文章目录
官网说明: https://cwiki.apache.org/confluence/display/AMBARI/Configuration+support+in+Ambari
设置方法
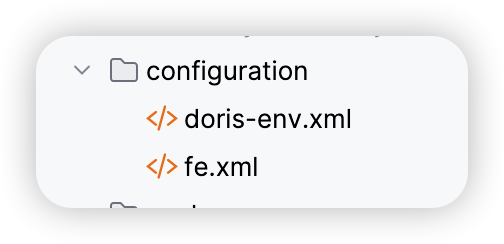
服务需要配置的参数统一都是由.xml格式文件进行配置,默认会读取configuration/目录下的.xml文件。可以通过配置metainfo.xml中的<configuration-dir></configuration-dir>参数修改读取的目录。
在configuration/目录下的.xml文件,都会在WebUI显示,如下图所示:
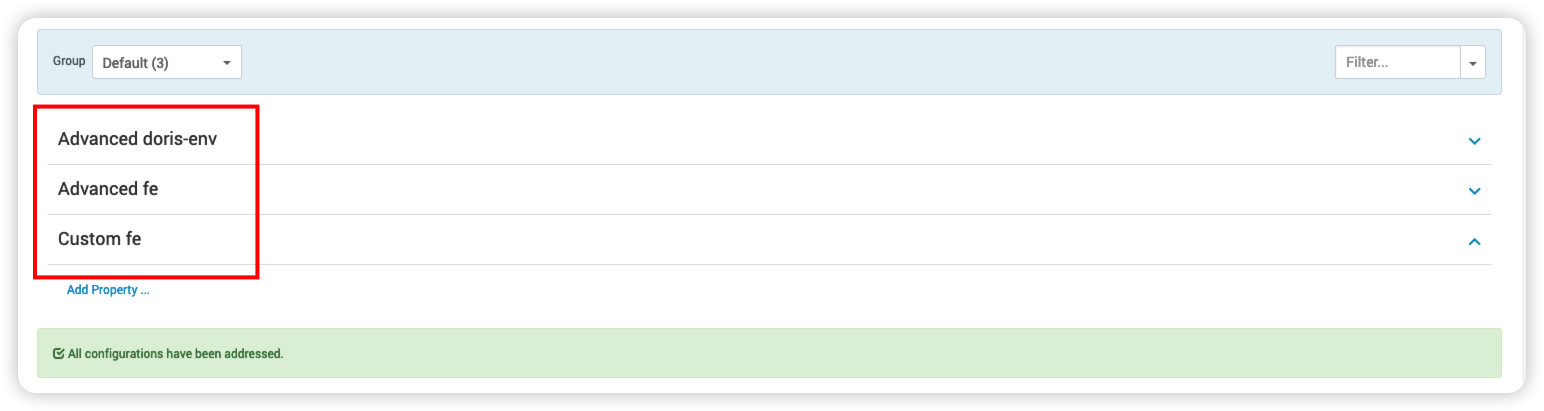
配置文件设置Custom xxx
默认配置文件在WebUI可以配置两种,一种是我们在.xml文件中指定的配置对应Advanced xxx,另外一种是自定义配置对应上面页面中Custom xxx,自定义配置主要应对我们没有提前设置的参数,可以自定义补充。可以通过在.xml文件中参数supports_adding_forbidden="true"来控制是否需要Custom xxx,设置为false或者不添加该参数是需要Custom xxx。
配置方法
<configuration supports_adding_forbidden="true">
  ...
</configuration>
详细配置Custom xxx的方法见05.Ambari自定义服务开发-自定义服务配置文件生成
配置文件详细的配置方法
.xml文件的整体格式
<?xml version="1.0"?>
<?xml-stylesheet type="text/xsl" href="configuration.xsl"?>
<configuration>
....
</configuration>
在<configuration>下可以设置我们需要配置的具体配置参数了
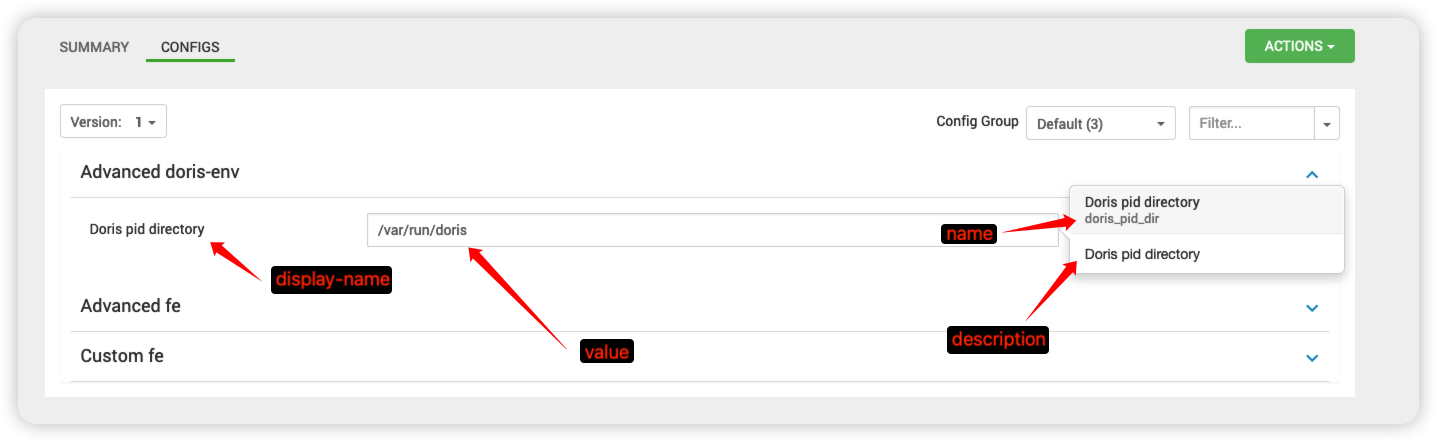
基础参数格式
<property>
        <name>doris_pid_dir</name>
        <display-name>Doris pid directory</display-name>
        <value>/var/run/doris</value>
        <description>Doris pid directory</description>
</property>
说明:
- name:属性名称
- display-name:WebUI中显示的属性名称,如未设置display-name,前端页面显示name值
- value:属性具体值,在WebUI中显示的值,可修改
- description:描述信息,在WebUI中显示。
在页面中如下图所示
value-attributes配置介绍
参考:https://blog.csdn.net/qq_44226094/article/details/130210270
用于设置参数的类型、是否为空等等
样例
<!-- 这里规定了属性值的类型为int,最小值为0,最大值为48000 -->
<value-attributes>
  <!-- 值类型
    boolean/ int/ float/ directory/ directories/ content/
    value-list/ user/ password -->
  <type>int</type>

  <!--是否可复写 true/ false -->
  <overridable>true</overridable>
  <!-- 空值是否有效 true/ false -->
  <empty-value-valid>true</empty-value-valid>
  <!-- property是否 ui true/ false -->
  <ui-only-property>true</ui-only-property>
  <!-- 不可编辑 true / false -->
  <read-only>true</read-only>
  <!--值是否在安装时可编辑 true/ false -->
  <editable-only-at-install></editable-only-at-install>
  <!-- property 显示值 true/ false -->
  <show-property-name></show-property-name>
  <!-- 步长 -->
  <increment-step>100</increment-step>
  <!-- 可选值 -->
  <selection-cardinality>2+</selection-cardinality>
  <!-- property 文件名 -->
  <property-file-name></property-file-name>
  <!-- property文件类型 -->
  <property-file-type></property-file-type>
  <!-- 条目 -->
  <entries>
    <entry>
      <value>2</value>
    </entry>
    <!-- ... -->
  </entries>
  <!-- 隐藏 -->
  <hidden></hidden>
  <!--条目是否可编辑 true/ false -->
  <entries-editable></entries-editable>
  <!-- 用户组 -->
  <user-groups></user-groups>
  <!-- 密钥库是否启用 true/ false -->
  <keystore></keystore>
  <!-- 最小值 -->
  <minimum>0</minimum>
  <!-- 最大值 -->
  <maximum>48000</maximum>
  <!-- 值单位 B/ MB/ ms/ Bytes/ milliseconds -->
  <unit></unit>
  <!--可见  -->
  <visible></visible>
  <!-- 复制 -->
  <copy></copy>
</value-attributes>
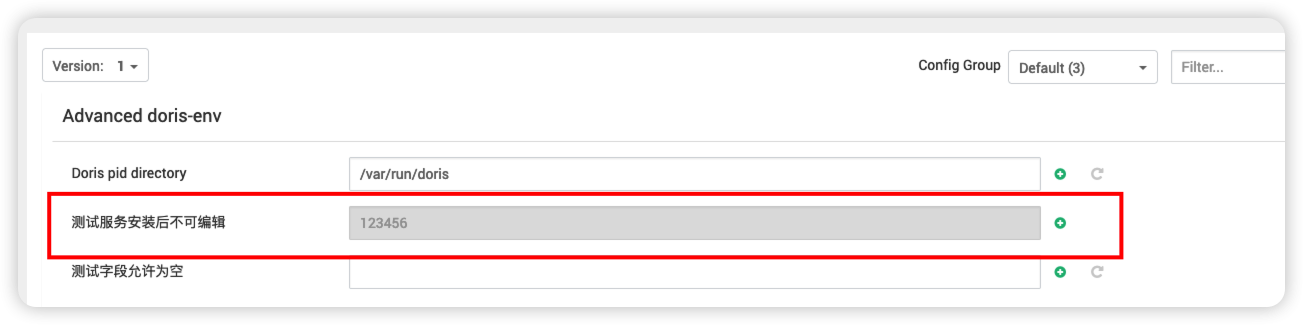
设置属性在服务安装后不可修改
在<property>标签内添加:
<value-attributes>
  <editable-only-at-install>true</editable-only-at-install>
</value-attributes>
使用样例
<property>
        <name>test_editable-only-at-install</name>
        <display-name>测试服务安装后不可编辑</display-name>
        <value>123456</value>
        <description>测试服务安装后不可编辑描述</description>
        <value-attributes>
            <editable-only-at-install>true</editable-only-at-install>
        </value-attributes>
</property>
效果
设置允许字段为空
在<property>标签内添加:
<value-attributes>
  <empty-value-valid>true</empty-value-valid>
</value-attributes>
使用样例
    <property>
        <name>test_empty-value-valid</name>
        <display-name>测试字段允许为空</display-name>
        <value>123456</value>
        <description>测试字段允许为空描述</description>
        <value-attributes>
            <empty-value-valid>true</empty-value-valid>
        </value-attributes>
    </property>
tip:
empty-value-valid参数为true代表可以为空,不设置或者为false是不能为空如果不设置
<empty-value-valid>true</empty-value-valid>参数,不填写内容,会提示需要填写
效果

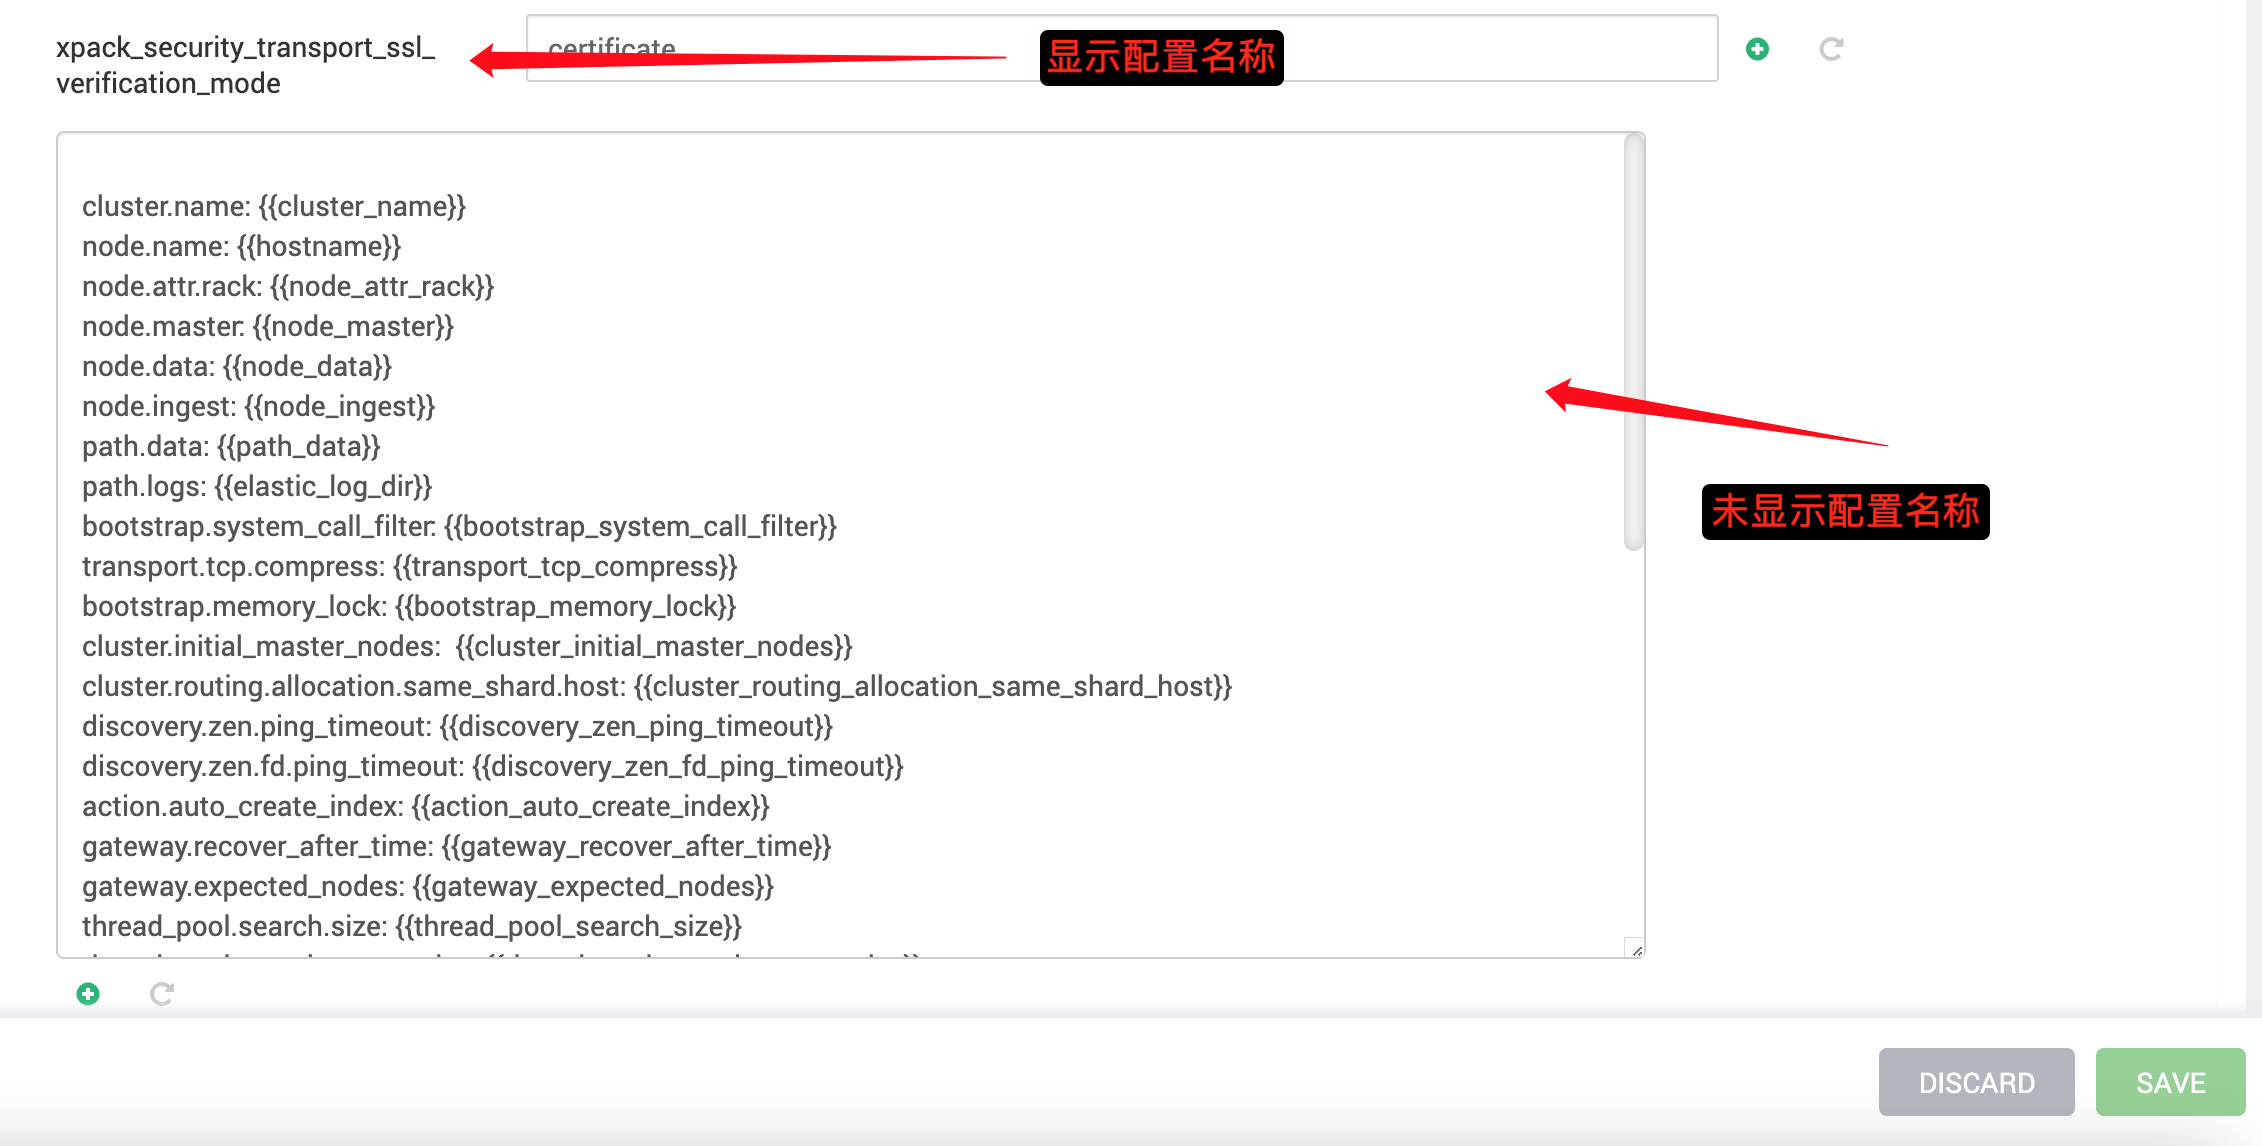
是否显示配置名称
在<property>标签内添加:
<value-attributes>
    <!-- 默认为input输入框,当type为content时,即为文本框 -->
    <type>content</type>
    <!-- 是否显示配置名称 -->
    <show-property-name>false</show-property-name>
</value-attributes>
使用样例
     <property>
        <name>test_show-property-name</name>
        <display-name>测试是否显示配置名称</display-name>
        <value>123456</value>
        <description>测试是否显示配置名称描述</description>
        <value-attributes>
            <!-- 默认为input输入框,当type为content时,即为文本框 -->
            <type>content</type>
            <!-- 是否显示配置名称 -->
            <show-property-name>false</show-property-name>
        </value-attributes>
    </property>
效果
参数类型设置
字符串类型
    <property>
        <name>fe_passwd</name>
        <display-name>Frontend密码</display-name>
        <value>  </value>
        <description>默认无密码,用来添加节点、检查节点连接客户端使用</description>
    </property>
Password
    <property>
        <name>fe_passwd</name>
        <display-name>Frontend密码</display-name>
        <value>  </value>
        <value-attributes>
            <type>password</type>
        </value-attributes>
        <description>默认无密码,用来添加节点、检查节点连接客户端使用</description>
    </property>
样例

Boolean
    <property>
        <name>test_type_boolean</name>
        <display-name>测试类型-boolean</display-name>
        <value></value>
        <value-attributes>
            <type>boolean</type>
        </value-attributes>
    </property>
样例

Int
    <property>
        <name>test_type_int</name>
        <display-name>测试类型-int</display-name>
        <value></value>
        <value-attributes>
            <type>int</type>
        </value-attributes>
    </property>
样例

Float
    <property>
        <name>test_type_float</name>
        <display-name>测试类型-float</display-name>
        <value></value>
        <value-attributes>
            <type>float</type>
        </value-attributes>
    </property>
样例

Directory
填写目录格式数据,非目录格式无法填写
    <property>
        <name>test_type_directory</name>
        <display-name>测试类型-directory</display-name>
        <value></value>
        <value-attributes>
            <type>directory</type>
        </value-attributes>
    </property>
样例

Directories
填写多个目录格式数据,多个目录采用逗号分隔,或者换行分隔,换行分隔保存后会自动转换成逗号分隔
    <property>
        <name>test_type_directories</name>
        <display-name>测试类型-directories</display-name>
        <value></value>
        <value-attributes>
            <type>directories</type>
        </value-attributes>
    </property>
样例

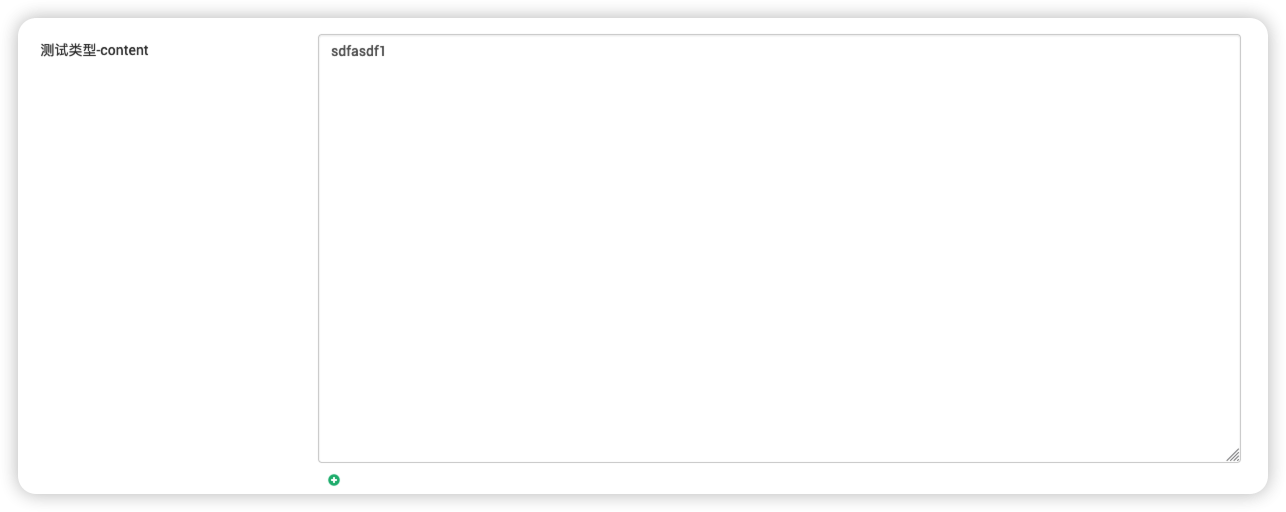
Content-多行文本
    <property>
        <name>test_type_content</name>
        <display-name>测试类型-content</display-name>
        <value></value>
        <value-attributes>
            <type>content</type>
        </value-attributes>
    </property>
样例
user-自动创建用户和用户组
配置后会自动创建用户和用户组,并将用户设置到某个组下,doris-env.xml文件部分内容如下
    <property>
        <name>doris_user</name>
        <display-name>Doris user</display-name>
        <value>doris</value>
        <description>Doris user</description>
        <!--选择配置的属性为用户,设置成用户则会自动创建该用户-->
        <property-type>USER</property-type>
        <value-attributes>
            <type>user</type>
            <overridable>false</overridable>
            <!--设置用户所属用户组-->
            <user-groups>
                <!--设置用户组属于,cluster-env->user_group的配置-->
                <!--读取的配置最终会统一汇总到/var/lib/ambari-agent/data/command-xxx.json这个文件,可以在这里直接查询验证-->
                <property>
                    <type>cluster-env</type>
                    <name>user_group</name>
                </property>
                <!--设置用户组属于,doris-env->doris_group的配置,这里doris-env就是当前文件的配置-->
                <property>
                    <type>doris-env</type>
                    <name>doris_group</name>
                </property>
            </user-groups>
        </value-attributes>
    </property>

    <property>
        <!--创建用户组,组名为doris_group-->
        <name>doris_group</name>
        <display-name>doris User Group</display-name>
        <value>doris_group</value>
        <property-type>GROUP</property-type>
        <description>doris user group.</description>
    </property>
上面配置实现了:创建一个名为doris的用户,并将其分配到特定的用户组(doris_group和hadoop)
tip:cluster-env->user_group获取到的值就是hadoop